Identifying and Replacing a Faulty CMOS Battery in Your Laptop
Laptops are integral to our daily lives, facilitating work, education, and entertainment. However, like all electronic devices, they require maintenance to function optimally. One often overlooked but crucial component is the CMOS (Complementary Metal-Oxide-Semiconductor) battery. This small battery powers the BIOS firmware, ensuring your laptop starts correctly and maintains essential system settings. When the CMOS battery fails, it can cause a range of issues, from incorrect date and time settings to boot failures. In this blog post, we’ll delve into identifying and replacing a faulty CMOS battery, a vital skill for anyone interested in laptop repair.
1. Understanding the CMOS Battery
Source: HP
Definition and Function
The CMOS battery is a small, coin-shaped battery located on the laptop’s motherboard. It powers the CMOS chip, which stores BIOS settings. The BIOS (Basic Input/Output System) is a firmware interface between the laptop’s hardware and operating system. It initializes hardware components during startup and provides runtime services for operating systems and programs. Without a functional CMOS battery, your laptop would lose its BIOS settings, leading to various startup issues. The CMOS chip retains crucial information such as system date and time, hardware configuration, and boot order. This information is essential for the laptop to boot up correctly and operate efficiently. The CMOS battery ensures this data is preserved even when the laptop is powered off. Typically, a CMOS battery lasts for about 3 to 5 years, depending on the laptop’s usage and environmental conditions.
Why CMOS Batteries Fail
CMOS batteries can fail for several reasons, impacting the laptop’s performance:
Age: Like all batteries, CMOS batteries have a finite lifespan. Over time, they lose their ability to hold a charge, leading to failure. Regular use of the laptop, even if it’s turned off, gradually depletes the battery.
Environmental Factors: CMOS batteries are sensitive to environmental conditions. Extreme temperatures, both high and low, can shorten their lifespan. High humidity can also cause corrosion, leading to battery failure.
Manufacturing Defects: Occasionally, CMOS batteries might have defects from the manufacturing process, leading to premature failure.
Understanding these causes can help you anticipate and prevent battery failures, ensuring your laptop remains reliable.
Symptoms of a Faulty CMOS Battery
Recognizing the signs of a failing CMOS battery is crucial for timely replacement. Here are the common symptoms:
Incorrect Date and Time: One of the most obvious signs is the laptop’s clock resetting every time you power it on. If you frequently need to reset the date and time, the CMOS battery is likely failing.
BIOS Errors: Frequent BIOS error messages or prompts to enter BIOS settings at startup can indicate a faulty CMOS battery. Errors might include messages like “CMOS Checksum Error” or “BIOS Battery Failure.”
Hardware Configuration Issues: The laptop might fail to retain hardware settings, causing boot problems. For instance, the system might not recognize attached peripherals or maintain boot order preferences.
Slow Boot Times: A failing CMOS battery can cause delays in the boot process as the system struggles to load BIOS settings.
By identifying these symptoms early, you can take steps to replace the CMOS battery before it leads to more significant issues.
2. Diagnosing a Faulty CMOS Battery
Preliminary Checks
Before diving into more complex diagnostics, start with these simple checks to determine if the CMOS battery is the issue:
System Date and Time: Check if the date and time reset every time you power on the laptop. This is a clear indicator of a failing CMOS battery.
BIOS Settings: Enter the BIOS setup during startup (usually by pressing a key like F2, DEL, or ESC) and check if your settings are being saved. If settings like boot order or hardware configurations reset, the CMOS battery might be the culprit.
Error Messages: Pay attention to any error messages related to the BIOS or CMOS settings during startup. Frequent errors suggest battery issues.
Advanced Diagnostic Tools
For a more precise diagnosis, you can use advanced tools and methods:
Multimeter: A multimeter is a handy tool to measure the voltage of the CMOS battery. First, safely remove the battery from the motherboard. Set the multimeter to measure DC voltage and place the probes on the battery’s terminals. A healthy CMOS battery should read around 3 volts. If the voltage is significantly lower, the battery needs replacement.
BIOS Battery Test: Some laptops come with built-in diagnostic tools that can test the CMOS battery. Access the BIOS setup and look for a battery status indicator. This feature might not be available on all laptops but can provide a quick assessment of the battery’s health.
System Diagnostics: Use system diagnostic tools provided by the laptop manufacturer. These tools can perform comprehensive tests on various hardware components, including the CMOS battery.
Visual Inspection: Sometimes, a visual inspection can reveal issues. Check the battery for signs of corrosion or leakage, which indicate a failing battery.
By using these diagnostic methods, you can accurately determine if the CMOS battery is the source of your laptop’s problems.
3. Preparing for CMOS Battery Replacement
Tools Needed
Gathering the right tools before starting the replacement process ensures a smooth and safe operation. Here’s what you’ll need:
Screwdrivers: Precision screwdrivers are essential for opening the laptop casing. Different laptops use different screw types, so a set with various sizes and types (Phillips, flathead, Torx) is useful.
Anti-Static Wrist Strap: This strap prevents static electricity from damaging sensitive laptop components. Attach one end to a grounded metal object and wear the strap on your wrist.
Plastic Pry Tools: These tools help in gently prying open the laptop casing without causing damage.
Replacement CMOS Battery: Ensure you have the correct replacement battery. Check your laptop’s manual or the old battery for specifications.
Safety Precautions
Safety is paramount when working with electronic devices. Follow these precautions:
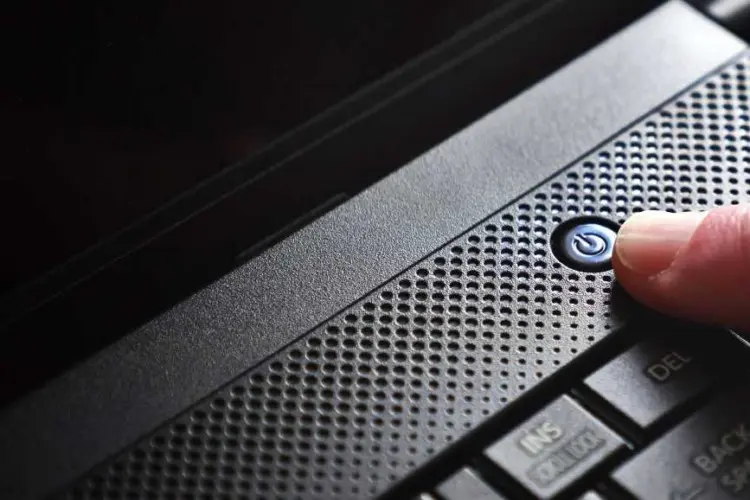
Power Off and Unplug: Always turn off your laptop and unplug it from any power source before starting the replacement process. This prevents electric shock and damage to the laptop.
Static Electricity Precautions: Static electricity can damage electronic components. Use an anti-static wrist strap and work on a non-conductive surface. Avoid wearing static-prone clothing like wool.
Work in a Clean Environment: Ensure your workspace is clean and free from dust. Small particles can cause damage to sensitive components.
Handle Components Carefully: Electronic components are delicate. Handle them with care, and avoid touching connectors and circuit boards directly.
Organize Screws and Parts: Keep track of screws and small parts removed during disassembly. Use a small container or magnetic mat to organize them.
Finding the Correct Replacement Battery
Identifying the correct replacement battery is crucial. Follow these steps:
Check the Laptop Manual: The manual often lists the specifications for the CMOS battery. If you don’t have a physical copy, you can usually find it online on the manufacturer’s website.
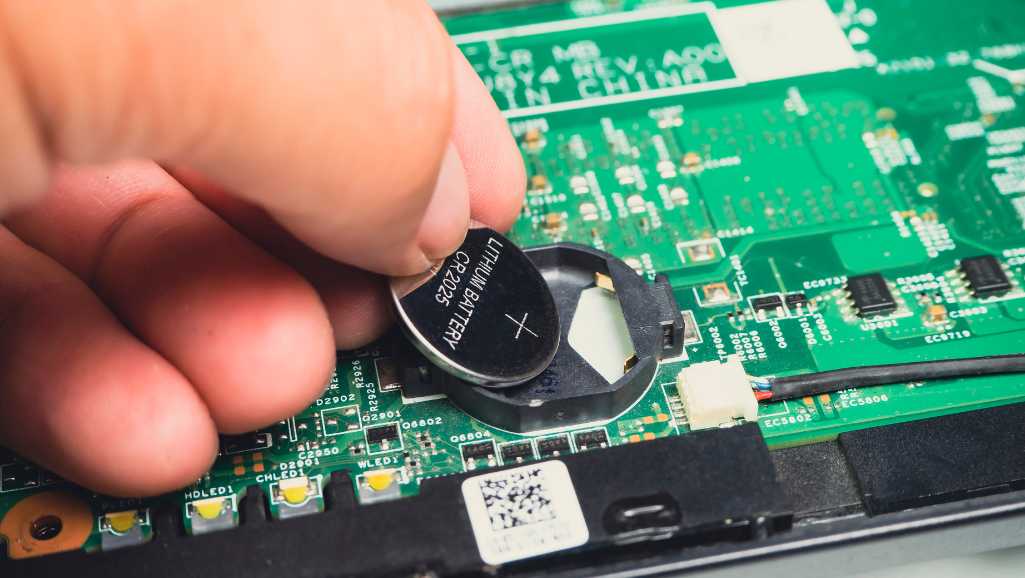
Inspect the Old Battery: Remove the old battery and check for model numbers and voltage specifications. Common CMOS battery types include CR2032, CR2025, and CR2016.
Purchase from Reliable Sources: Buy the replacement battery from reputable electronics stores or online retailers. Ensure the battery is new and from a trusted brand to avoid premature failure.
By preparing adequately, you ensure a smooth and successful CMOS battery replacement.
4. Step-by-Step CMOS Battery Replacement
Accessing the CMOS Battery
To access the CMOS battery, you’ll need to disassemble your laptop. Here’s a general guide:
Refer to the Manual: Check your laptop’s manual for specific disassembly instructions. Different models have varying designs and components.
Remove the Battery and Power Cord: Start by removing the main laptop battery and unplugging the power cord. This ensures there’s no power running through the laptop.
Unscrew the Bottom Panel: Use a precision screwdriver to remove the screws securing the bottom panel. Keep the screws organized as you’ll need them for reassembly.
Gently Pry Open the Panel: Use plastic pry tools to carefully lift the bottom panel. Avoid using metal tools as they can damage the casing.
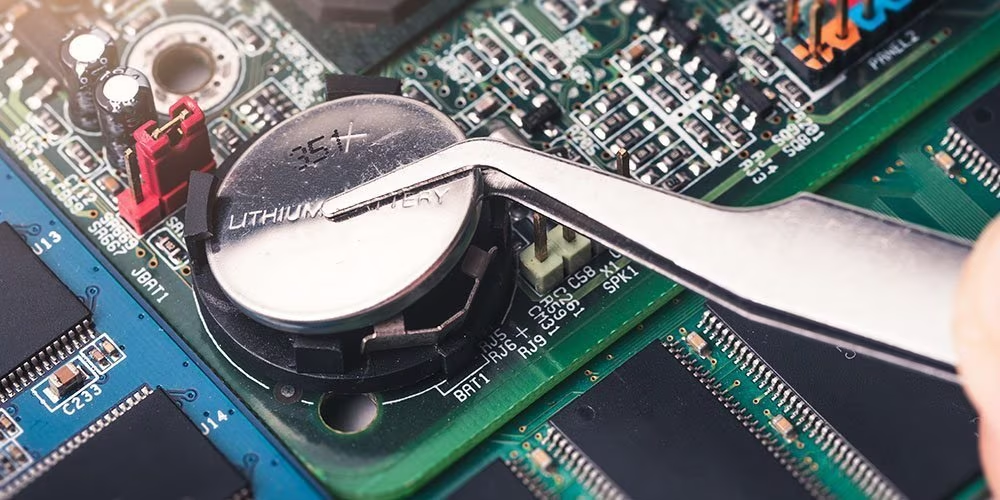
Locate the CMOS Battery: Once the bottom panel is removed, locate the CMOS battery on the motherboard. It’s usually a coin-cell battery held in a small socket.
Removing the Faulty Battery
Identify the Battery Holder: The CMOS battery is typically in a holder with a clip or a small cover. Carefully inspect how it’s secured.
Gently Remove the Battery: Use a non-metallic tool or your fingers to gently pop the battery out of its holder. Avoid using excessive force to prevent damage.
Check for Corrosion: Inspect the battery holder for any signs of corrosion or damage. Clean it with a soft cloth if necessary.
Installing the New Battery
Insert the New Battery: Place the new battery into the holder, ensuring the correct orientation. The positive side (usually marked with a +) should face up.
Secure the Battery: Ensure the battery is firmly seated in the holder. It should snap into place or fit snugly without wobbling.
Double-Check Placement: Before reassembling, double-check that the battery is correctly placed and secure.
Reassembling the Laptop
Replace the Bottom Panel: Carefully align the bottom panel and press it back into place. Ensure all clips and edges fit correctly.
Secure the Screws: Reattach the screws to secure the bottom panel. Tighten them evenly to avoid damaging the casing.
Reconnect the Battery and Power Cord: Reinsert the main battery and plug in the power cord.
Power On the Laptop: Turn on the laptop to ensure it boots up correctly.
5. Post-Replacement Procedures
Configuring BIOS Settings
After replacing the CMOS battery, you’ll need to configure the BIOS settings:
Enter BIOS Setup: During startup, press the key to enter BIOS setup (commonly F2, DEL, or ESC).
Set Date and Time: Navigate to the date and time settings and set them correctly.
Restore Default BIOS Settings: If the BIOS settings were reset, restore them to your preferred configuration. This might include boot order, hardware configurations, and system preferences.
Save and Exit: Save the changes and exit the BIOS setup. The laptop will restart with the new settings.
Testing the New CMOS Battery
Verify Fixes to Initial Problems: Check if the initial symptoms, such as incorrect date and time, have been resolved. The laptop should now retain settings even after power cycling.
Reboot the System: Power cycle the laptop a few times to ensure the new battery is functioning correctly and settings are saved.
Monitor for Stability: Use the laptop for a few days and monitor for any recurring issues. If problems persist, double-check the installation and battery compatibility.
6. Preventive Measures and Maintenance
Regular BIOS Updates
Keeping your BIOS updated can prevent many issues and ensure optimal performance. Here’s how to stay current:
Check Manufacturer’s Website: Periodically visit the laptop manufacturer’s website for BIOS updates.
Follow Update Instructions: Carefully follow the instructions provided for updating the BIOS. Incorrect updates can cause serious issues.
Backup Settings: Before updating, backup your current BIOS settings. This ensures you can restore them if something goes wrong.
Environmental Care
Proper environmental care can extend the life of your CMOS battery and laptop:
Temperature Control: Avoid exposing your laptop to extreme temperatures. Store and use it in a cool, dry place.
Humidity Control: High humidity can cause corrosion. Keep your laptop in a low-humidity environment.
Avoid Direct Sunlight: Direct sunlight can overheat the laptop and damage internal components, including the CMOS battery.
Regular System Checks
Regular system checks can help catch potential issues early:
Monitor CMOS Battery Health: Use a multimeter periodically to check the CMOS battery voltage. Replace it before it fails completely.
Run System Diagnostics: Utilize system diagnostic tools to check the overall health of your laptop. Address any issues promptly.
Clean the Laptop: Regularly clean the laptop’s vents and internal components to prevent dust buildup, which can cause overheating and other issues.
Conclusion
The CMOS battery is a small yet vital component in your laptop. Recognizing the symptoms of a faulty CMOS battery and knowing how to replace it can save you from significant headaches and ensure your laptop runs smoothly. Regular maintenance and environmental care can extend the life of your CMOS battery, keeping your system reliable and efficient. By following these guidelines, you can master the skill of CMOS battery replacement, an essential aspect of laptop repair.
FAQ Section
What is a CMOS battery for?
The CMOS (Complementary Metal-Oxide-Semiconductor) battery is a small, coin-shaped battery found on your laptop’s motherboard. Its primary function is to power the CMOS chip, which stores critical BIOS (Basic Input/Output System) settings. These settings include system time and date, hardware configurations, and boot order preferences. The CMOS battery ensures this information is retained even when your laptop is powered off, enabling it to boot up correctly and efficiently every time.
Can a PC run without a CMOS battery?
Yes, a PC can run without a CMOS battery, but it won’t function optimally. Without a CMOS battery, the BIOS settings will reset to default every time the PC is powered off. This means you will have to manually configure the date, time, and other BIOS settings each time you start your computer. Additionally, the system might experience boot delays and errors. While the PC will still operate, the inconvenience and potential for errors make it essential to have a working CMOS battery.
Will removing the CMOS battery delete everything?
Removing the CMOS battery will not delete your files or operating system. However, it will reset the BIOS settings to their default state. This includes system date and time, boot order, and hardware configurations. Any custom settings you had in the BIOS will need to be reconfigured after replacing the battery. It’s a good practice to note down your BIOS settings before removing the CMOS battery, so you can easily restore them afterward.
Is a CMOS battery a normal battery?
A CMOS battery is similar to a regular battery in that it provides power, but it is specifically designed for low-power applications like maintaining BIOS settings. The most common type of CMOS battery is a CR2032 lithium coin-cell battery, which is widely used in various electronic devices for memory backup. While it might look like a regular button cell battery, its role in a computer system is unique and crucial for maintaining system settings when the device is powered off.
Faulty CMOS battery replacement in Singapore
Is your laptop acting up with incorrect dates and frequent BIOS errors? It might be a faulty CMOS battery causing these issues. Instead of struggling with these persistent problems, why not get it fixed by the experts at Volta PC Upgrade & Repair? At Volta PC Upgrade & Repair, we specialize in diagnosing and repairing laptop issues, including CMOS battery replacements. Our skilled technicians have the experience and tools to swiftly identify and replace faulty components, ensuring your laptop runs smoothly and efficiently. We understand the intricacies of various laptop models and handle each device with utmost care. Why choose Volta PC Upgrade & Repair? We offer:
Expertise: Our technicians are highly trained and experienced in laptop repairs.
Quality Parts: We use only high-quality replacement parts to ensure longevity and reliability.
Quick Turnaround: We value your time and strive to complete repairs swiftly.
Customer Satisfaction: Our top priority is your satisfaction. We provide excellent customer service and transparent pricing.
Don’t let a small issue like a faulty CMOS battery disrupt your productivity. Visit Volta PC Upgrade & Repair today and let us restore your laptop to its optimal performance. Contact us now to schedule your repair and experience the best in laptop care!
Address:
Tai Seng Branch: 8 Burn Road #01-04, Trivex, Singapore 369977
12 Clear Signs Your Gaming Laptop Needs Repair (Before It Gets Worse) Gaming laptops are built for speed and heavy workloads. But even top-tier machines