Laptop charging circuit problems are common and can stem from various sources, impacting the device’s functionality and user experience. Issues can range from a simple faulty adapter to complex motherboard failures, all of which need careful diagnosis and repair. Understanding the root cause of these issues is crucial for effective troubleshooting and repair. Importance of Addressing These Issues Timely intervention can prevent minor problems from escalating into major ones. Unaddressed charging issues can lead to data loss, reduced battery life, and in severe cases, damage to the motherboard. Addressing these problems promptly ensures the longevity and reliability of the laptop. Brief Mention of Tools and Skills Required Repairing laptop charging circuits requires a blend of technical skills and tools. Essential tools include a multimeter, soldering kit, oscilloscope, and diagnostic software. Proficiency in these tools, combined with a solid understanding of laptop circuitry, is necessary to diagnose and fix charging issues effectively.
Key Takeaways
Comprehensive Diagnosis: Effective laptop charging circuit repair requires thorough diagnosis, including visual inspection, multimeter testing, and diagnostic software to identify the root cause of the issue.
Common Issues: Common causes of charging problems include faulty AC adapters, damaged DC jacks, deteriorating batteries, and motherboard issues, each requiring specific repair techniques.
Step-by-Step Repairs: Addressing each component systematically, such as replacing the AC adapter, repairing or replacing the DC jack, testing and replacing the battery, and performing motherboard repairs, ensures comprehensive troubleshooting.
Professional Assistance: For complex issues like motherboard repairs or short circuits, seeking professional help from services like Volta PC Upgrade & Repair can provide expert solutions and ensure the longevity of your laptop.
Common Causes of Charging Circuit Failures
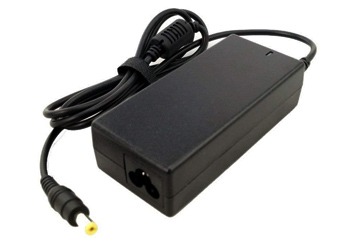
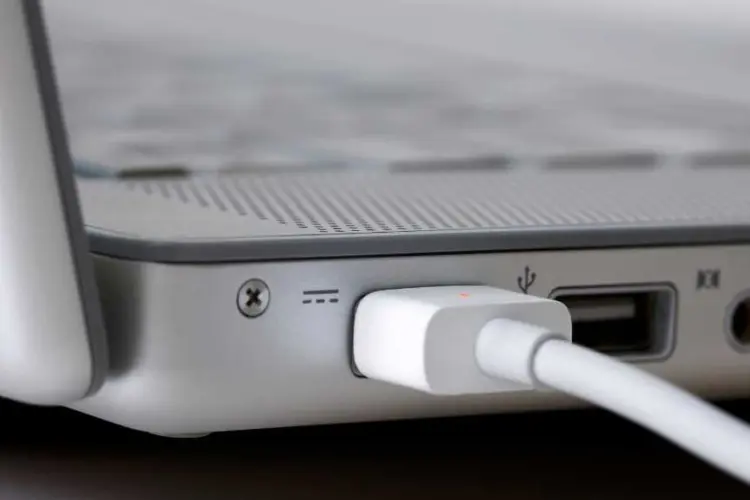
Faulty AC Adapter One of the most frequent culprits behind charging issues is a faulty AC adapter. Over time, the adapter’s components can wear out, resulting in inconsistent power delivery. Common signs include no charging light, intermittent charging, or visible damage to the wires or plug. Testing the adapter with a multimeter can confirm if it’s the source of the problem. Damaged DC Jack The DC jack, where the adapter plugs into the laptop, is susceptible to damage from frequent use. A loose or damaged DC jack can disrupt the power flow, leading to charging problems. Symptoms include a loose connection, the need to hold the adapter at a specific angle for charging, and visible wear around the port. Battery Issues Batteries have a limited lifespan and can degrade over time due to extensive usage and charging cycles. A failing battery might not hold a charge, charge slowly, or cause the laptop to shut down unexpectedly. Battery management software can help diagnose the battery’s health and determine if it needs replacement. Motherboard Problems Though less common, motherboard issues can also cause charging problems. Faulty capacitors, damaged charging circuits, or power regulation components on the motherboard can prevent proper charging. Diagnosing these issues often requires advanced techniques like microsoldering and thorough understanding of laptop circuitry.
Diagnosing Charging Circuit Issues
Visual Inspection Techniques Start with a thorough visual inspection of the laptop, focusing on the AC adapter, DC jack, and battery. Look for signs of physical damage, burnt components, or loose connections. Inspect solder joints on the motherboard for cracks or breaks, which can indicate poor connections affecting the charging circuit. Using Multimeters A multimeter is essential for diagnosing electrical issues. Use it to measure the voltage output of the AC adapter and the voltage at the DC jack. Check for continuity in the charging circuit to identify any breaks. Additionally, use the multimeter to test for short circuits, which can prevent proper charging. Diagnostic Software Tools Software tools can help diagnose battery health and charging issues. Battery management software provides insights into the battery’s capacity, charge cycles, and overall health. System diagnostics tools can check the laptop’s power management system and identify any faults in the charging circuitry.
Step-by-Step Repair Procedures
Repairing or Replacing the AC Adapter
Testing the Adapter: Use a multimeter to measure the adapter’s output voltage. If it doesn’t match the specified voltage, replace the adapter.
Replacing the Adapter: Purchase a compatible adapter for your laptop model. Plug it in and check if the charging issue is resolved.
Fixing the DC Jack
Symptoms of a Faulty DC Jack: If the connection is loose or charging stops when the adapter is moved, the DC jack is likely faulty.
Replacement Process:
Disassemble the laptop to access the DC jack.
Desolder the old jack and carefully remove it.
Solder a new DC jack in place, ensuring secure connections.
Reassemble the laptop and test the charging function.
Battery Troubleshooting and Replacement
Testing Battery Health: Use diagnostic software to check the battery’s health status. If the battery shows signs of degradation, it needs replacement.
Safe Battery Replacement:
Power off the laptop and unplug the AC adapter.
Remove the back cover and disconnect the battery.
Install the new battery, ensuring all connections are secure.
Reassemble the laptop and verify that it charges correctly.
Motherboard Repairs
Identifying Motherboard Issues: Use a multimeter to check the voltage at various points on the motherboard. Look for anomalies in the power delivery.
Microsoldering Guide:
Use a microscope to inspect the damaged components.
Carefully remove the faulty component using a soldering iron.
Solder a new component in place, ensuring all connections are precise.
Test the motherboard to ensure the issue is resolved.
Advanced Troubleshooting Techniques
Chip-Level Repairs
Understanding Voltage Regulation Circuits: Learn the layout and function of the voltage regulation circuits on the motherboard. These circuits manage the power flow to various components.
Replacing Faulty Chips: Identify the faulty chips using a multimeter and replace them with new ones. This process requires precision and expertise in soldering.
Using Oscilloscopes
Signal Tracing Techniques: Use an oscilloscope to trace the power signals on the motherboard. This helps identify where the power flow is disrupted.
Identifying Signal Irregularities: Compare the observed signals with the expected patterns. Irregular signals indicate faulty components or connections.
Preventative Measures and Maintenance
Tips to Avoid Future Charging Issues
Handle the AC adapter and DC jack gently to prevent damage.
Regularly clean the DC jack and adapter port to remove dust and debris.
Use surge protectors to protect the laptop from power surges.
Regular Maintenance Routines
Periodically check the battery health using diagnostic tools.
Ensure the laptop’s ventilation is clear to prevent overheating, which can affect the battery and charging circuit.
Conclusion
Understanding and repairing complex laptop charging circuit issues require a blend of technical knowledge, practical skills, and the right tools. By following the detailed diagnostic and repair procedures outlined in this guide, you can effectively address and resolve these issues. For complex motherboard repairs, seeking professional help is recommended to ensure the longevity and reliability of your laptop. Whether you’re a DIY enthusiast or a professional technician, mastering these techniques will enhance your ability to keep laptops running smoothly.
FAQs on Laptop Charging Circuit
How to Check the Charging Circuit of a Laptop?
To check the charging circuit of a laptop, follow these steps:
Visual Inspection: Look for any obvious signs of damage such as burnt components, loose connections, or broken solder joints around the DC jack and charging circuit area.
Test the AC Adapter: Use a multimeter to measure the output voltage of the AC adapter. Ensure it matches the specified voltage for your laptop.
Check the DC Jack: Inspect the DC jack for any signs of damage or looseness. Use a multimeter to check for continuity from the DC jack to the motherboard.
Measure Battery Voltage: Remove the battery and measure its voltage with a multimeter. Compare this with the battery’s rated voltage.
Test Charging Circuit: With the laptop powered off, measure the voltage at the charging points on the motherboard using a multimeter. Check if the voltage is being properly transferred from the AC adapter to the battery.
Use Diagnostic Software: Use battery management software to get insights into the battery’s health and charging status. This can help identify if the issue is with the battery itself or the charging circuit.
Is Laptop Charging AC or DC?
Laptop charging involves both AC and DC. The AC (Alternating Current) from the wall outlet is converted to DC (Direct Current) by the laptop’s power adapter. Laptops and most other electronic devices operate on DC power. The adapter converts the high-voltage AC from the outlet to a lower-voltage DC that the laptop’s internal components require for operation and charging the battery.
How to Repair a Laptop Charging System?
Identify the Problem: Determine if the issue is with the AC adapter, DC jack, battery, or internal charging circuit by following the diagnostic steps mentioned above.
Repair or Replace the AC Adapter: If the adapter is faulty, replace it with a new one that matches the laptop’s specifications.
Fix the DC Jack: If the DC jack is damaged or loose, it may need to be resoldered or replaced. This typically involves disassembling the laptop to access the jack, desoldering the old one, and soldering a new one in place.
Replace the Battery: If the battery is not holding a charge, replace it with a new one that is compatible with your laptop model.
Motherboard Repairs: For issues within the motherboard, such as faulty charging circuits, you may need to perform microsoldering to replace damaged components. This requires specialized skills and equipment.
Professional Help: For complex repairs or if you’re not confident in performing the repairs yourself, take your laptop to a professional repair service like Volta PC Upgrade & Repair.
How to Fix a Short Circuit on a Laptop?
Power Down Immediately: If you suspect a short circuit, turn off the laptop and unplug it from the power source immediately.
Disassemble the Laptop: Carefully disassemble the laptop to access the motherboard and internal components.
Visual Inspection: Look for any signs of damage such as burnt areas, discolored components, or broken solder joints that might indicate a short circuit.
Use a Multimeter: Set the multimeter to the continuity mode and test various points on the motherboard to identify the exact location of the short circuit. Check the power rails and other critical points.
Replace Faulty Components: Once you’ve identified the shorted component, replace it with a new one. This might involve desoldering the faulty component and soldering a new one in place.
Test the Repairs: After replacing the components, reassemble the laptop and test it to ensure the short circuit has been resolved.
Seek Professional Help: If you are unable to identify or repair the short circuit, consider taking the laptop to a professional repair service like Volta PC Upgrade & Repair for expert assistance.
These steps should help you diagnose and repair common laptop charging issues, ensuring your device remains functional and reliable.
If you’re experiencing laptop charging issues and need expert assistance, don’t hesitate to bring your device to Volta PC Upgrade & Repair. Our skilled technicians specialize in diagnosing and repairing complex charging circuit problems, ensuring your laptop is up and running in no time. Visit us today and experience top-notch service and reliable solutions for all your laptop repair.
Address:
Tai Seng Branch: 8 Burn Road #01-04, Trivex, Singapore 369977
Laptop charging circuit problems are common and can stem from various sources, impacting the device’s functionality and user experience. Issues can range from a simple
The Acer Aspire E7-575G is a robust laptop that offers great performance for everyday tasks and more demanding applications. However, like all electronic devices, it