Can Super Glue Really Save Your Laptop Hinge
Can Super Glue Really Save Your Laptop Hinge? Welcome to the dynamic world of laptop maintenance, specifically focusing on the critical aspect of laptop hinge

In the world of laptops, there’s one part that often gets overlooked: the humble hinge. These crucial components hold your screen in place and allow it to open and close smoothly. However, they can also run into problems. From loosening over time to outright breaking, laptop hinge issues can be a real headache. But don’t worry, this comprehensive guide is here to help. Whether you’re diagnosing hinge issues, gathering tools for a DIY fix, or deciding if professional help is needed, we’ve got you covered. By the end of this article, you’ll be well equipped to handle any laptop hinge problem that comes your way.
Understanding laptop hinges is a critical part of laptop maintenance. So, let’s delve deeper into the subject.
They are the small, yet significant components that attach the monitor to the laptop’s body. Without them, your screen would be nothing more than a separate entity.
Fundamentally, laptop hinges serve two key functions. Initially, they maintain the screen’s position. This is critical for daily tasks, whether it’s typing up an important report or watching a favourite movie. On top of that, they provide the necessary flexibility. With them, you can open, close, and adjust your laptop’s screen to your liking.
Now, imagine your laptop without these vital components. There’s no way to adjust your screen’s angle. You’d likely strain your neck, and working on the laptop could become uncomfortable. So, it’s easy to see why these hinges are integral to a laptop’s function.
However, laptop hinges are not always infallible. Over time, they may develop issues. If the hinges become loose or break, the laptop’s functionality is compromised. You might struggle to keep the screen at the right angle, or even worse, the screen could detach entirely.
For instance, the laptop might not close properly. This leaves it vulnerable to dust and potential physical damage. In some cases, a broken hinge could even lead to problems with the laptop’s internal components, like the hard drive or motherboard.
In summary, laptop hinges might be small, but their role is anything but. They maintain your screen’s position, allow for necessary flexibility, and protect your laptop from damage. Understanding their function is a vital step in diagnosing and fixing laptop hinge problems. In the end, keeping them in good shape will help ensure a long and productive life for your laptop.
In our next section, we will look into how to diagnose laptop hinge problems. So stay tuned!
After understanding laptop hinges, the next step is diagnosing any issues. How can you tell if your laptop hinge needs repair? Let’s find out.
The first sign is often obvious: a loose screen. This can be especially noticeable when you’re opening or closing your laptop. If the screen wobbles excessively or doesn’t stay in place, your hinges might be the culprit.
Additionally, look for unusual noises. Do you hear creaking or scraping sounds when moving the screen? These could be signs of a hinge problem.
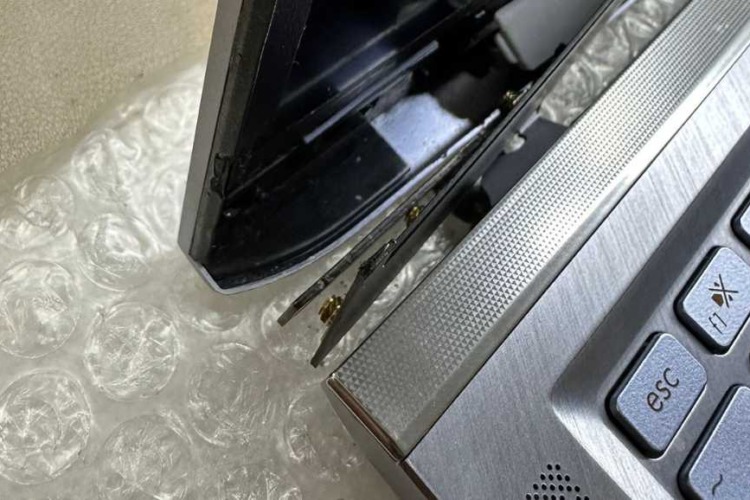
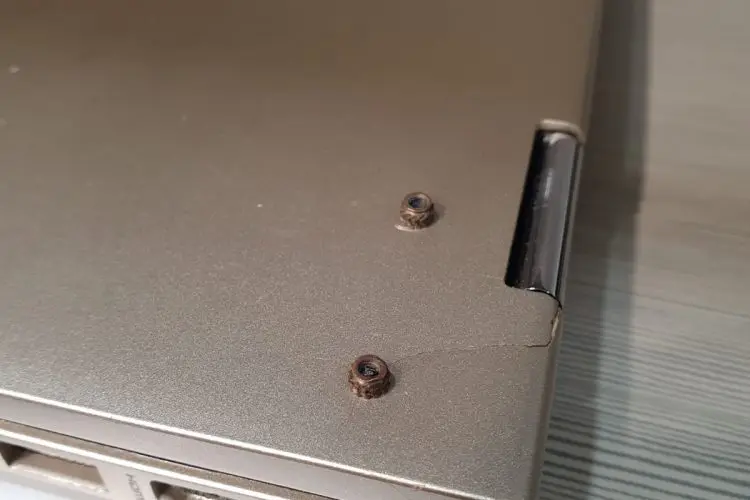
Physical inspection is also key. Hinges can wear out or break, and the damage is often visible. So, check your laptop for any cracks or damage around the hinge area.
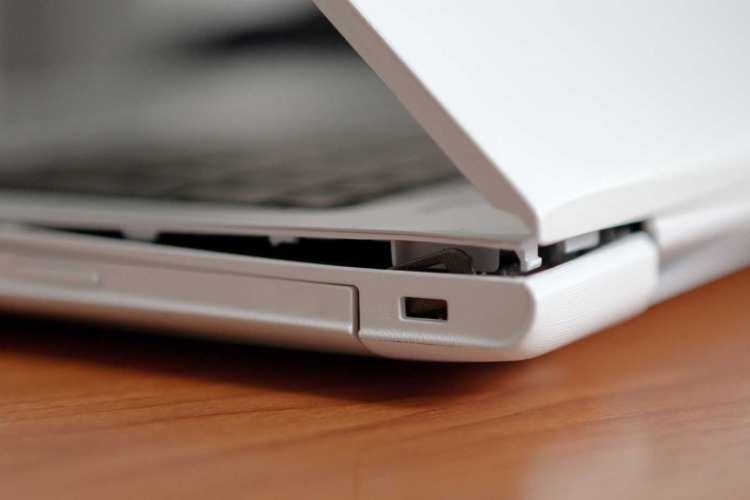
Next, check if your laptop closes properly. If the laptop doesn’t shut completely or if it’s difficult to close, this could indicate a hinge problem.
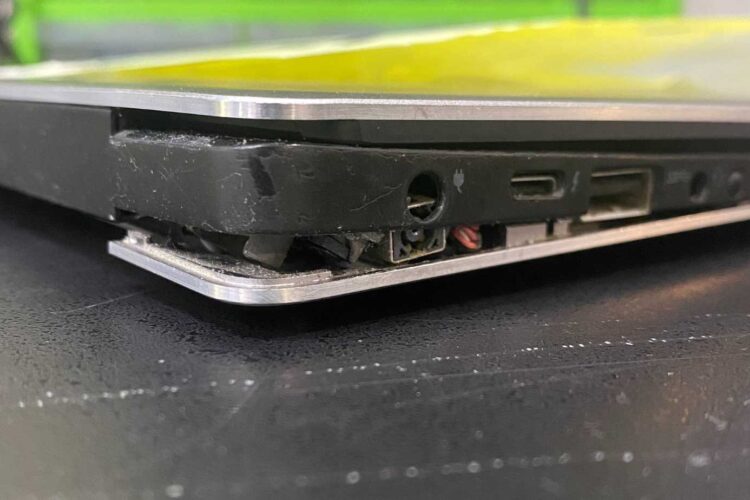
Sometimes, a faulty hinge can lead to further complications. For example, if your laptop’s case starts to separate near the screen or the base, the hinges could be at fault.
The risks of ignoring a faulty hinge are significant. The screen is one of the most delicate parts of a laptop, and a broken hinge can damage it. A wobbly screen can strain the video cable, leading to display issues.
In worst-case scenarios, a faulty hinge could even damage your laptop’s internal components. For instance, if the laptop doesn’t close properly, dust and debris could get inside, potentially harming the motherboard or other components.
The first step is to stop using the laptop. Continued use can exacerbate the problem and lead to more extensive (and expensive) damage.
Then, consider if you can fix the hinge yourself. Some issues can be solved with basic tools and a bit of patience. For others, you might need professional help. We’ll explore both these options in later sections.
In conclusion, diagnosing laptop hinge issues is a vital part of laptop maintenance. By paying attention to the signs and acting quickly, you can prevent more serious problems. However, remember: if you’re unsure about fixing it yourself, it’s always best to consult a professional. Stay tuned for the next section, where we’ll discuss the tools needed for fixing laptop hinges.
So, you’ve identified a problem with your laptop hinge. What’s next?
Firstly, you’ll need a screwdriver set. Laptop screws are often small and can vary in size. A precision screwdriver set designed for electronics can handle this task.
Secondly, grab a pair of needle-nose pliers. These can help you handle small parts without losing them in the process.
A spudger is your next tool. It’s a plastic or metal stick, used to safely pry open electronic devices. This tool can be crucial in avoiding damage while opening your laptop.
An anti-static wristband is a good idea too. When working on electronic devices, it’s possible to build up static electricity. This can damage your laptop’s internals. The wristband discharges this electricity safely.
For a well-rounded DIY laptop repair kit, include tweezers as well. They are excellent for handling tiny screws and other small parts.
Now, where does the adhesive come in?
Sometimes, a broken hinge needs a bit more than just tightening. An epoxy adhesive can provide a strong, permanent bond to fix a damaged hinge.
Let’s not forget about the cleaning supplies. Compressed air can blow away dust from your laptop’s internals. Meanwhile, isopropyl alcohol can clean the laptop surfaces before you reassemble it.
Many of these items are available at your local electronics or hardware store. Alternatively, you can buy them online. Some stores even sell complete laptop repair kits, which could save you time and effort.
In conclusion, fixing a laptop hinge can be a straightforward process with the right tools. A precision screwdriver set, needle-nose pliers, a spudger, anti-static wristband, tweezers, adhesive, and cleaning supplies are the main components of your DIY toolkit.
Remember, while DIY laptop hinge repair can save money, it’s not always the best solution. If the problem is severe, or if you’re not comfortable doing it yourself, professional help is the best way forward. We’ll discuss more about that in the coming sections.
Stay tuned to learn a step by step guide to fix a laptop hinge.
Ready to tackle that laptop hinge issue? With the right tools at hand, you’re all set. Here’s a step-by-step guide to help you through it.
Start by cleaning your workspace. Make sure it’s clear of any clutter. This will help prevent losing any small screws or parts. Now, gather all the tools we discussed in the previous section.
Before you begin, ensure you’ve backed up all important data. While you’re focusing on the hinge, accidents can happen. Protecting your data should always be the first step in any repair process.
Next, turn off your laptop and unplug it. Also, remove the battery if it’s removable. It’s crucial to ensure no power is flowing through the laptop during the repair process.
Open the laptop as far as it can go. Look closely at the hinges. Are there any visible signs of damage or loose screws? If screws are loose, you might only need to tighten them. More severe damage could require a hinge replacement.
If you need to fix or replace the hinge, you’ll have to detach the screen. Use your screwdriver to remove the screws on the back of the screen. Then, use the spudger to carefully pry the screen away from the hinges.
Now, you can either tighten the hinge or replace it. If the hinge is broken, remove it and replace it with a new one. If it’s loose, use your screwdriver to tighten it. And if it’s cracked, an epoxy adhesive can help.
Once the hinge is fixed, reattach the screen. Then, reinsert all the screws. Make sure everything is tight and secure.
Remember, every laptop model is different. Your laptop might require slightly different steps. Always refer to your laptop’s specific manual or seek professional guidance if you’re unsure.
Fixing a laptop hinge might seem intimidating. But with patience and the right tools, it’s an achievable task. This step-by-step guide should help you navigate the process.
Still, there are instances when DIY solutions might not be enough. Some hinge problems require a professional touch. In the next section, we’ll explore when to seek professional help for laptop hinge repair. Stay tuned!
While DIY repair can be rewarding and cost-effective, sometimes professional help is the best choice. So, when should you turn to a professional for laptop hinge repair?
They provide comprehensive laptop repair services, including laptop hinge repair. Our technicians are well equipped to handle complex repairs and will take good care of your laptop.
In conclusion, it’s important to balance the benefits of DIY repair with the potential risks and costs. Professional laptop repair services like Volta PC Upgrade Repair can take the stress out of the process, saving you time and potentially avoiding further damage to your laptop.
Remember, understanding the role of your laptop hinges, diagnosing issues, knowing the tools needed for repairs, and having a guide to fix problems are all steps in the right direction. However, there’s no shame in seeking help when needed. In fact, it’s the smart thing to do. Laptop hinge repair doesn’t have to be a hassle, whether you do it yourself or seek the help of professionals.

Yes, a laptop hinge can be repaired. Depending on the severity of the problem, it can be as simple as tightening a loose screw or may require replacing the hinge altogether. While some users may be comfortable doing this themselves, others might prefer to seek professional help.
The cost of fixing a laptop hinge can vary depending on the complexity of the repair and the cost of any replacement parts. On average, you can expect to pay anywhere from $50 to $200 for professional repair services. DIY repairs, on the other hand, will typically cost the price of replacement parts and any necessary tools.
Fixing a loose hinge on a laptop often involves tightening the screws that hold the hinge in place. To do this, you will need a screwdriver that fits the screws on your laptop model. It’s important to be gentle to avoid causing further damage. If the hinge is damaged beyond simple loosening, you might need to replace it.
While it’s technically possible to use a laptop with a broken hinge, it’s not recommended. A broken hinge can put stress on other components, potentially causing additional damage. It can also affect the alignment of your laptop screen, leading to strain on the eyes. It’s best to address hinge problems as soon as they arise.
Laptop hinge problems can be a nuisance, but they don’t have to signal the end of your laptop’s life. By understanding the role of the hinges, recognizing the signs of hinge problems, and knowing how to address them, you can prolong the life of your laptop. This guide has taken you through diagnosing laptop hinge issues, the necessary tools for DIY repair, how to fix laptop hinge, and when to seek professional help.
Remember, there’s no shame in turning to professionals like VOLTA PC Upgrade & Repair when you need to. After all, a healthy laptop is a happy laptop, and a happy laptop makes for a happy user!
Address: Tai Seng Branch: 8 Burn Road #01-04, Trivex, Singapore 369977

Can Super Glue Really Save Your Laptop Hinge? Welcome to the dynamic world of laptop maintenance, specifically focusing on the critical aspect of laptop hinge

Dealing with a cracked bottom on your laptop can be a frustrating experience, but with the right knowledge and actions, you can effectively repair and

Welcome to our comprehensive guide on “How to Handle a Cracked Laptop Bottom.” In today’s fast-paced digital world, laptops have become essential tools for both

How To Fix Laptop Hinge: Ultimate Laptop Repair Guide Singapore Laptop hinges are vital to our computing experience, allowing us to open and close our